
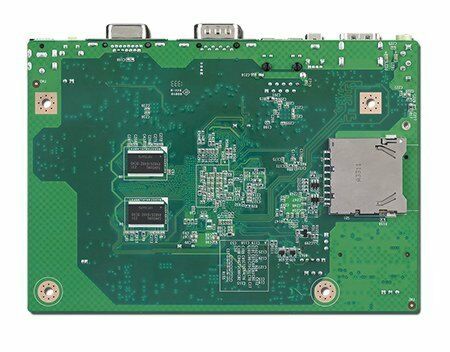
NXP i.MX6 Dual Core 1 GHz/1GB DDR 0~60C
RSB-4410CD-MDA1EMain Features:
- NXP Cortex-A9 i.MX6 Solo/Dual core 1.0 GHz
- On-board DDR3 1 GB & 4 GB eMMC NAND Flash
- Supports full HD 1080P H/W video codec engine
- Networking capability of Giga LAN, WiFi and HSPA
- Low power consumption
- Supports Linux and Android BSP

Frequently Asked Questions
The RSB-4410 uses a Freescale i.MX6 ARM Cortex-A9 dual-core processor running at 1 GHz. It supports 1 GB of onboard DDR3 memory (DDR3 1066 MHz) and 4 GB of onboard eMMC flash storage.
The board provides:
- 1 x single channel 18/24-bit LVDS
- 1 x HDMI
- 1 x VGA
- 1 x USB2.0 Type A connector plus 2 x USB2.0 pin headers
- 1 x Line out audio jack
- 1 x SD slot
- 3 UARTs (2 x 2-wire pin headers, 1 x 4-wire UART via DB9 connector)
- 1 x Gigabit Ethernet (10/100/1000 Mbps)
- 1 x miniPCIe slot
- 1 x SIM slot
- 1 x IR remote control pin header
- 1 x Reset button
The RSB-4410 uses a 12V DC power input. Power consumption is 2.3 W in kernel idle mode and up to 4.08 W in max mode.
The operating temperature range is 0 to 60°C (32 to 140°F), with operating humidity of 40°C at 95% RH non-condensing. Storage temperature is -40 to 85°C.
The RSB-4410 has been tested and complies with FCC Part 15 rules for Class A digital devices when operated in a commercial environment.
The board includes 4 GB onboard eMMC flash and supports SD/MMC cards (Class 2, 4, 6, 8, 10) up to 32 GB (SDHC) via the SD slot. It also has a full-size miniPCIe slot supporting both USB and PCIe interfaces for expansion cards such as WiFi or 3G modules, along with a SIM slot for 3G integration.
The RSB-4410 supports Linux BSP based on Linux kernel 3.0.35. Development is done on a Ubuntu 10.04 LTS host; the platform is designed for Linux only and is not intended for Windows or Android host development.
The RSB-4410 is a 3.5" SBC with dimensions of 146 x 102 mm (5.7" x 4"), a height of 15.92 mm, and a reference weight of 640 g including whole package.
The RSB-4410 has a full-size miniPCIe slot that supports both USB and PCIe interfaces, and it includes an onboard SIM socket for 3G integration. Tested module part numbers include EWM-C106FT01E (3G) and EWM-W142F01E (WiFi). A half-sized WiFi card requires an optional extending bracket (P/N 1960047454N000).
HDMI supports a maximum resolution of 1920x1080p (actual resolution depends on the monitor used). VGA supports up to 1920x1080. The LVDS connector supports a single channel 18/24-bit panel up to 1920x1080.
How-to Guides
- Turn off the power supply before changing jumper settings.
- Locate jumper J1 (Boot device) on the board.
- Set J1 to ON to boot from SD card.
- Set J1 to OFF to boot from SPI.
- Connect the debug port cable to the RSB-4410 debug port.
- Connect the RS-232 extension cable to the debug cable.
- Connect the other side of the extension cable to a USB-to-RS-232 cable, then connect it to your PC.
- Open a serial communication program (such as HyperTerminal, Tera Term, or PuTTY) on the host PC and configure the settings as documented.
- Insert the power adapter connector into the DC jack on the RSB-4410 to power up the board; the bootloader prompt will display on the terminal screen.
- Insert a valid SIM card into the onboard SIM socket (CN4) to enable dialing to a 3G network.
- Insert a supported miniPCIe module (e.g., 3G module P/N EWM-C106FT01E or WiFi module P/N EWM-W142F01E) into the full-size miniPCIe slot (CN3).
- If using a half-sized WiFi card, install the optional extending bracket (P/N 1960047454N000) to secure the card.
- For 3G, use the 3glink test command to send AT dial commands.
- For WiFi, bring up the wlan0 interface, scan, configure WPA settings, and run dhclient to obtain an IP address.
- Confirm the power supply provides 12V DC as required by the board.
- Connect the 12V DC input to Pin 1 (DC_IN) and Pin 2 (GND) of the DC power jack (CN10), or alternatively use the internal power input pin header (CN13) with the same DC_IN/GND pinout.
- Power up the board and verify the bootloader prompt appears on the debug console.
- Open a Terminal on Ubuntu 10.04 LTS and switch to root authority (sudo su).
- Insert an SD card into the developing computer and identify its device location (e.g., /dev/sdf).
- Change directory to the BSP's scripts folder.
- Run ./mksd-linux.sh /dev/sdf and type "y" to copy the system files to the SD card.
- Insert the completed Linux system SD card into the RSB-4410 SD card slot (SD1) to boot from it.
- To transfer the system to onboard flash: insert the SD card, connect a serial console, log in, then run ./mkinand-linux.sh /dev/mmcblk0 from the /mk_inand directory and confirm with "y".
- Power off and remove the SD card; the board will then boot from onboard flash.
| Manufacturer | Advantech |
|---|---|
| Watchdog TImer | 256-level timer interval, from 0 ~ 128 sec |
| Operating Temperature | 0°C ~ 60° C / -40°C ~ 85° C |
| Storage Temperature | 5%~95% Relative Humidity, non-condensing |
| Power Input Voltage | 12 V |
| Dimension | 146mm x 102mm x 20 mm |