
NVIDIA Jetson Nano Developer Kit
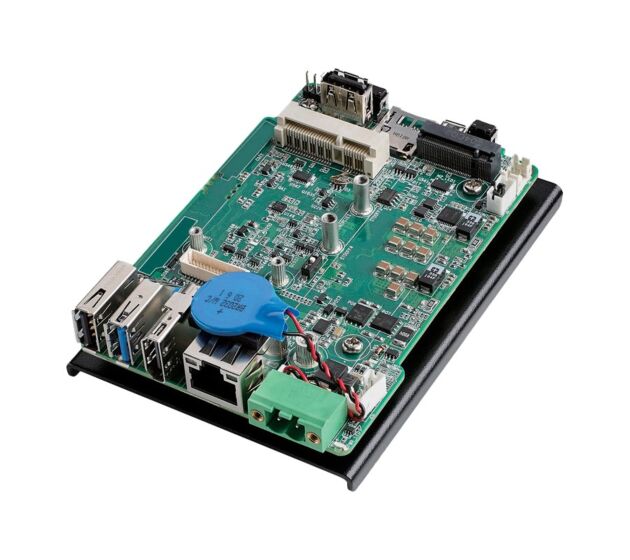
MIC-710AIL-DVA1- NVIDIA Jetson Nano embedded
- 1 x M.2 2280 NVMe for storage
- 1 x Mini PCIe for expansion
- Linux OS with BSP (board support package)
- Supports deep learning trained models

Frequently Asked Questions
The MIC-710AIL-DVA1 is built around the NVIDIA Jetson Nano module. It uses a Quad-Core Arm Cortex-A57 MPCore processor paired with a 128-core NVIDIA Maxwell GPU, delivering up to 472 GFLOPS.
It comes with 4GB LPDDR4 memory and 16GB of eMMC flash storage. It also supports 1 x Micro SD card for additional storage and this SKU (MIC-710AIL-DVA1) is configured with an SD card, per the ordering information.
The unit provides:
- 1 x GbE (10/100/1000 Mbps) Ethernet
- 1 x HDMI display output (max resolution 3840x2160 @ 60Hz)
- External USB: 1 x USB 2.0 and 1 x USB 3.2 Gen 1 (5 Gbit/s)
- Internal: 1 x USB 2.0 via pin header
- 1 x RS-232 serial port via pin header
- 1 x Micro USB OTG port
The board supports 1 x mPCIe slot (signal: PCIe x1 + USB 2.0), 1 x M.2 2280 slot (M-Key, NVMe, PCIe x4 signal), and 1 x Nano SIM card slot.
The unit accepts 12 to 24 VDC input through a 2-pin terminal block (AT mode).
The unit measures 116 x 82 x 30 mm (4.5" x 3.2" x 1.18") and weighs 150 g (0.33 lb). It has an open-frame carrier design.
The board ships with Jetpack 4.6 as its board support package (BSP).
Yes. It supports Allxon 24/7 remote monitoring and OTA (over-the-air) deployment.
Both use the NVIDIA Jetson Nano module with 4GB memory and 16GB eMMC. The MIC-710AIL-DVA1 includes a Micro SD card, while the MIC-710AIL-DVA2 does not.
How-to Guides
- Locate switch SW1 on the board.
- Set SW1 to
ON(default) to route Mini PCIe as USB 2.0 + PCIe x1, with the M.2 NVMe slot disabled (marked X). - Set SW1 to
OFFto route Mini PCIe as USB 2.0 only, enabling the M.2 slot for PCIe x4 NVMe operation.
- Locate the AT/ATX jumper on the board.
- Set the jumper to pins 1-2 for AT mode.
- Set the jumper to pins 2-3 for ATX mode.
- Use the supplied 2-pin power connector.
- Connect PIN1/2 to DCIN (12~24 V).
- Connect PIN3/4 to GND.
- Ensure the power source is within the 12-24 VDC range before powering on.
- Connect the supplied Micro USB recovery cable to the Micro USB OTG/Recovery port on the back of the unit.
- Use the Reset button located near the Micro SD and Recovery ports as needed during the recovery process.
| Manufacturer | Advantech |
|---|---|
| CPU Family | Intel Core |
| Base CPU Speed | Under 2.0 Ghz |
| USB 2.0 | 1-2 |
| USB 3.0 | 1-2 |
| Operating System | Linux |